Secure Printing
- Secure printing is a printing method designed to for sensitive documents
- This allows you to print items that are not supposed to be seen by other co-workers
- The job only starts printing once you are at the printing and have provided the correct prerequisites
- This can be especially useful for employees in HR and Finance
- The following document will provide step by step instructions on how to setup secure printing
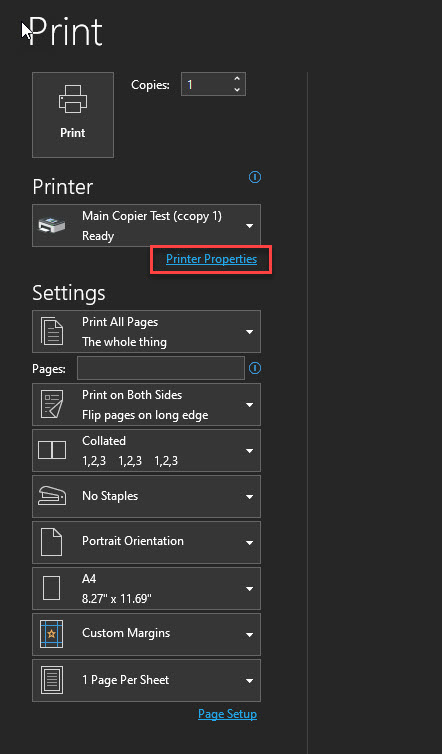
- Start with going to the print tab and selecting “Print Properties”
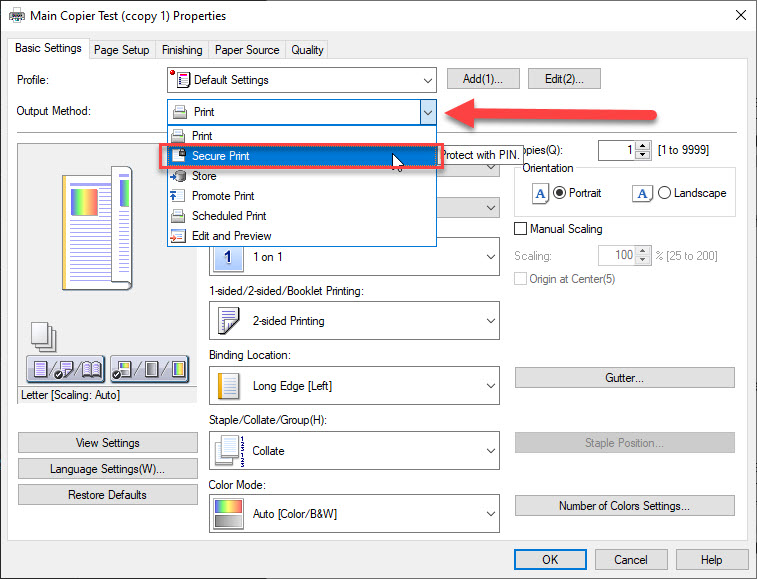
- Under the “Output Method”, there is an option named “Secure Print”
- Once you select the “Secure Print” option, a new pop up will appear with information
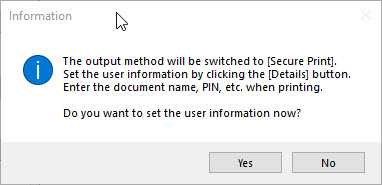
- Press the “Yes” button to setup the user information
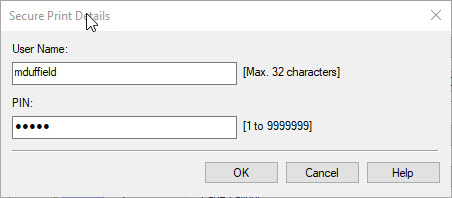
- After pressing the “Yes” button, a new window will open up with Username and PIN options
- The Username field will already be filled out
- Now you can setup your PIN
- Word will remember the PIN you setup for when you use Secure Print in the future
- Once you hit the “OK” button, you can press the print button
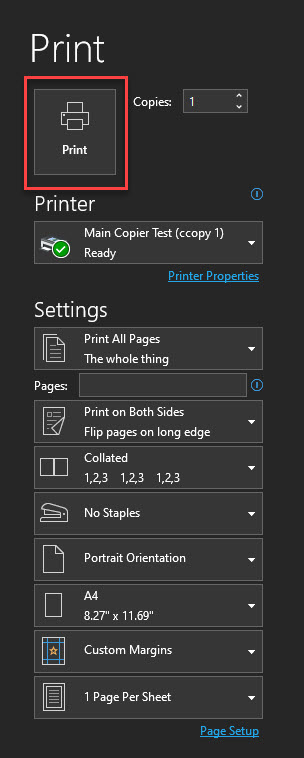
- After hitting the “Print” button, you can proceed to the printer
- At the designated printer, you will see a button on the printer named “Print” with a lock icon, as shown below
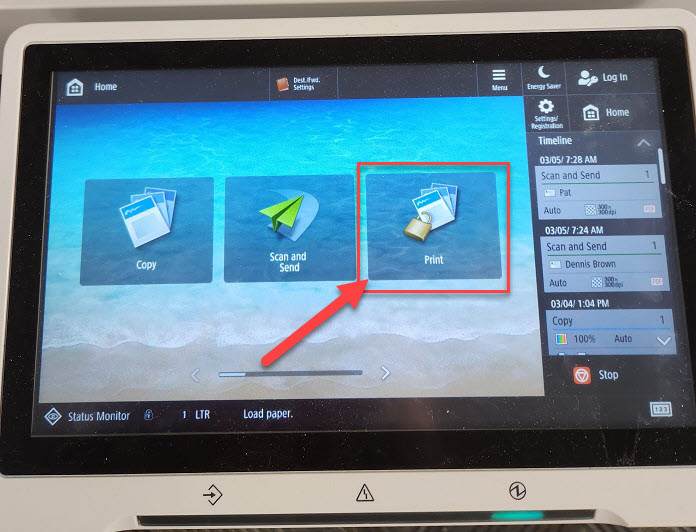
- This is the Secure Print button
- Click the “Secure Print” button
- It will display a list of documents waiting to be printed
- Find the document that you want to print and select it
- The documents will have the username listed with them, helping you determine what document you need
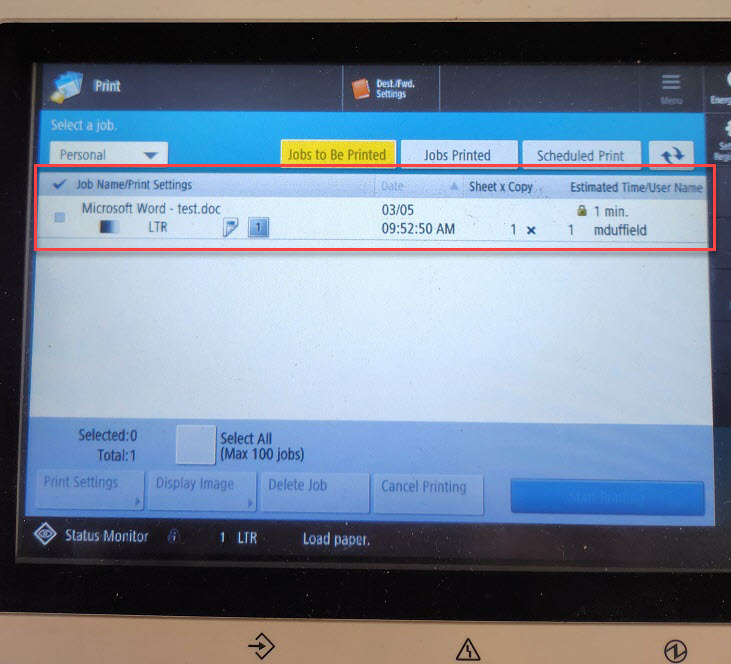
- Select the document you wish to print
- It will highlight the job yellow and allow you to select the “Start Printing” button
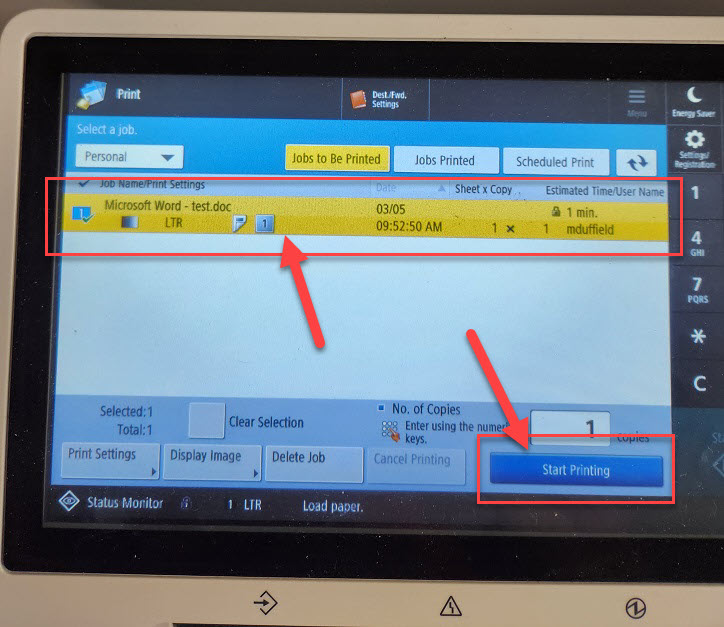
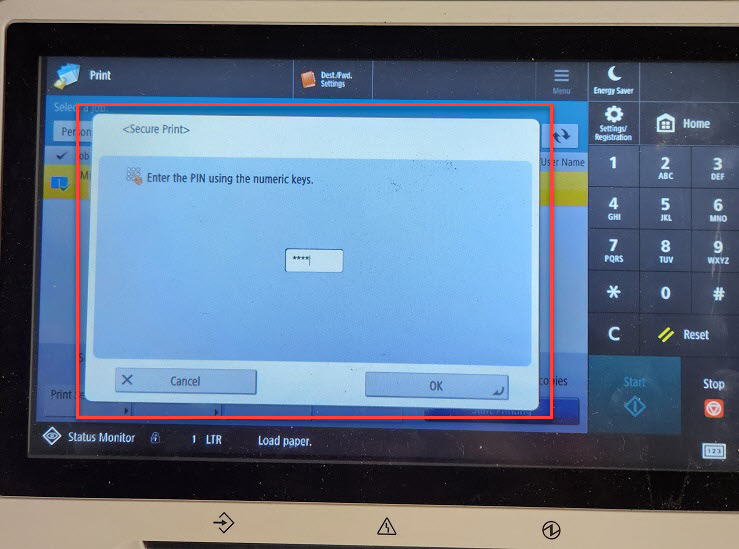
- Once you hit the “Start Printing” button, a new window will pop up asking you to input the PIN you setup in word
- After typing in you PIN and hitting the “OK” button, you job will start to print
- At the designated printer, you will see a button on the printer named “Print” with a lock icon, as shown below